
DocumentationChapter 06 of 14
06First steps after setup
Sign in with the admin account from the wizard. Then do these steps in this order.
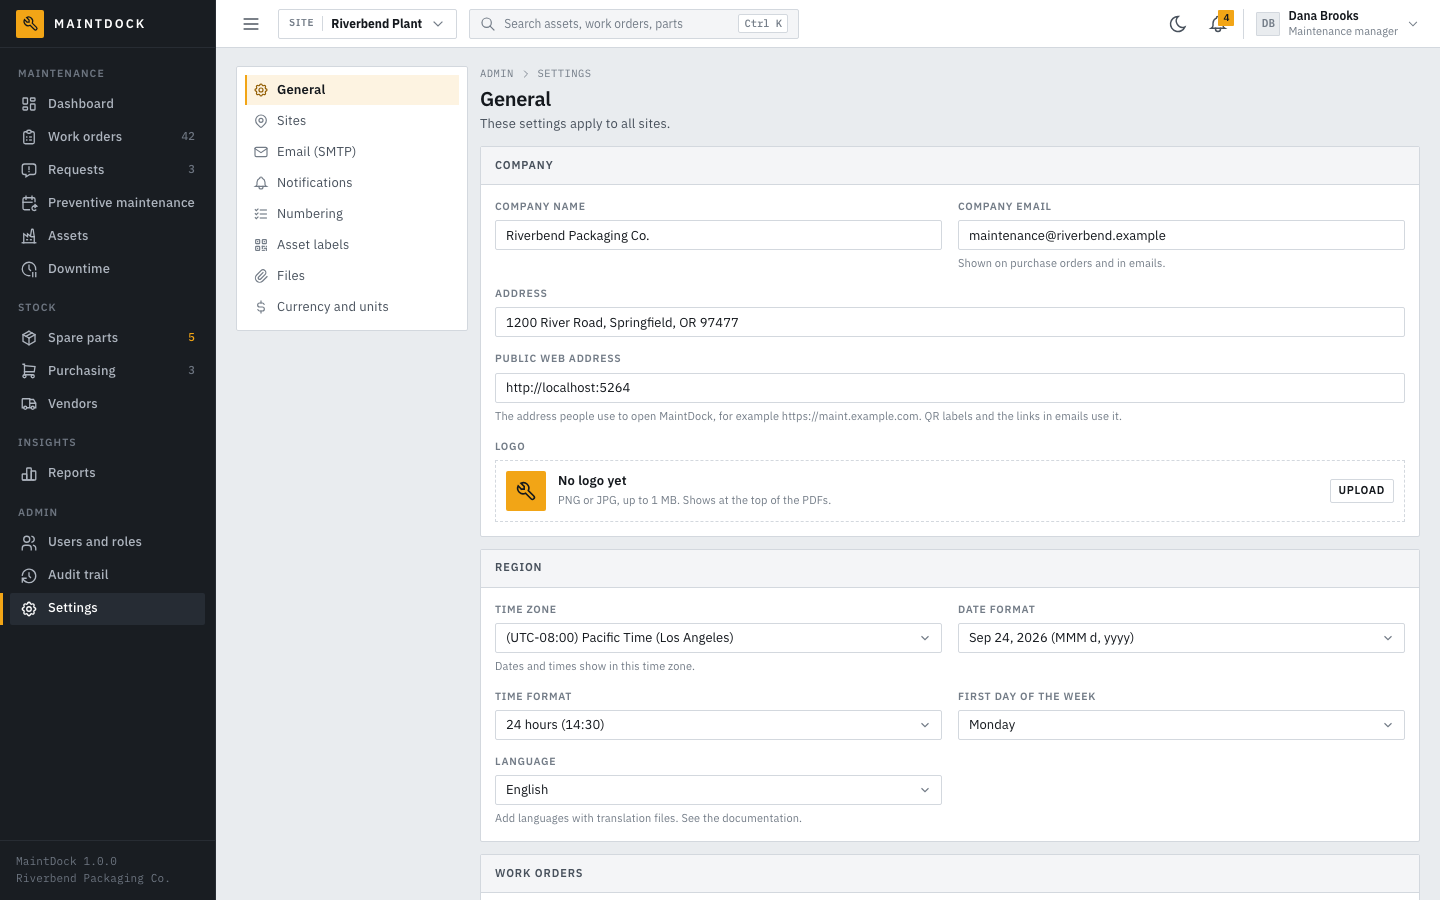
1. Check the general settings
Open Admin > Settings > General. Check the company name, the public web address, the time zone, the date and time format, and the language. Upload your company logo. It shows at the top of the work order, purchase order, and report PDFs.
Open Currency and units to check the currency, the meter unit (hours by default), and the availability target.
2. Set up email (SMTP)
Open Settings > Email (SMTP). Turn on Send email from MaintDock, and enter your mail server:
- SMTP server, for example
smtp.office365.comorsmtp.gmail.com. - Port, usually 587 or 465.
- Security: Auto, StartTLS, SSL, or None. Auto works for most servers.
- User name and Password. Leave them empty when the server needs no sign-in. MaintDock stores the password encrypted and never shows it again.
- From address (the sender of every email) and From name.
To check the values, enter your email address in the Send a test email card and click Send test email. This works also before you save. If you changed the server, port, security, or user name, type the password again for the test: MaintDock sends the saved password only to the saved server. If it fails, MaintDock shows the error from your mail server. Then click Save changes in the bar at the bottom of the page.
Without email, MaintDock still works. It shows notifications only in the app, you copy invitation and password reset links by hand, and you print purchase orders instead of emailing them.
3. Add your sites and stores
A site is a plant or another location. Open Settings > Sites and click Add site. Enter the site name, a short code, and the address. In the same dialog, add the stores of the site. A store is a stockroom where spare parts are kept. A new site starts with one store named Main store, and you can add more with Add store. Then click Save site. The wizard already created your first site and its store.
Areas, such as halls and rooms, are added on the Assets screen (step 5).
4. Add users and choose their roles
Open Admin > Users and roles and click Add user. Enter:
- The full name, the email (the user signs in with it), and the job title.
- The role: Admin, Manager, Technician, Requester, or a custom role. See Users, roles, and permissions.
- The sites the user can see, or All sites. Admins always see all sites.
- The hourly rate. MaintDock uses it for the labor cost on work orders.
- Email notifications: whether the user also gets their notifications by email.
- The password: Send an invitation (MaintDock emails a link, and the user chooses a password) or Set a password now (you tell the user the password). When email is not set up, you get a link to send to the user yourself. The link works for one day.
Then click Add and invite (or Add user when you set the password now).
5. Add your assets
Open Assets. At the top of the asset tree, click the Add area button to add the halls or rooms of a site. Then click the Add asset button (the plus sign) for each machine. To add a part of a machine (for example the motor of a conveyor), add an asset and pick the machine in Part of. See Assets.
Print a QR label for each machine, so people can scan it with a phone.
What to do next
- Add your spare parts and their stock in Spare parts.
- Add your suppliers in Vendors.
- Add preventive schedules in Preventive maintenance.
- Show your technicians the phone view.